(Review) iKan Tourbox Photo & Video Editing Console
There are a number of options for editing consoles out there for photo and video editing. I’ve tested quite a few, all with their own strengths as well as weaknesses. Some consoles are geared more toward photography editing, some video, and some excel at both. Here’s a quick rundown of the ones I’ve used…..
The variety of button sizes and shapes is one of my favorite design choices.
Taken with Nikon Z6 + Nikkor 60/2.8G Micro
There are a number of options for editing consoles out there for photo and video editing. I’ve tested quite a few, all with their own strengths as well as weaknesses. Some consoles are geared more toward photography editing, some video, and some excel at both. Here’s a quick rundown of the ones I’ve used, from lowest to highest in price:
Contour Design Shuttle-xPress ($60) – (Photo & Video) Good for what it is. Limited controls and not much cheaper than its bigger brother…
Contour Design Shuttle Pro ($99) – (Photo & Video) only $40 more than the xPress but significantly more buttons and controls. It’s also more ergonomic, with a nice mouse-like shape that fits well to the hand. Unfortunately, I do not much care for the actual control layout; there are only three types buttons – of which nine are identical in size and shape. This makes it very difficult to remember what does what and the learning curve to get accustomed to it is not pleasant. But, if your budget caps at 100 bucks, this is the one to get.
iKan Tourbox ($169) – (Photo & Video) the topic of this review and very much worth the extra $70 over the Shuttle Pro.
Loupedeck+ Photo & Video Console ($249) – Much larger than the prior three: about the size of a desktop keyboard. This isn’t bad per se – it allows for a lot of controls (buttons, dials, keys, wheels) and therefore a lot of quick adjustment points. Downside is that almost every control is labeled (aside from some function keys along the top). You can customize every control if you want, but they’re still labeled. I suppose you could tape some labels over them (there’s definitely space to do so). Some may see this as a positive and it certainly is if you plan to use the pre-sets as-is. Unfortunately, when I bought one, it would not work with Camera Raw, so it was returned. From what I understand, it now does work with ACR. Build quality also isn’t quite what you’d hope at its price point – dials/controls and overall build quality feels rather hollow and cheap.
Palette ($329-$729) – The Palette has a really interesting modular design, where you can buy the basic panel which has a number of controls, and then purchase additional “blocks” or “squares” to add to it (they’re magnetic). Unfortunately, I didn’t get a lot of time with this one, though it did strike me as expensive for the number of controls - the $329 Traveler Console has 4 modules: 3 sliders, 3 dials, and what seems to be five buttons. HOWEVER, their website indicates up to 270 functions in this set. I’m actually going to look into this further because the Traveler at $329 or the Studio Console at $429 seem like a great set-ups, though there is a new fly in the ointment near those price points:
I recently learned of Loupedeck’s new Creative Tool (aka Loupedeck CT), which clocks in at $549, but looks to be a thing of beauty. Reviews I’ve read have been very positive and the product photos and description promise a very, very handy piece of kit. I’m not pulling the trigger on it anytime soon, but it may be an option for others to consider.
There are a number of other options out there, many of which are geared either mostly or entirely toward video (Tangent Ripple, Blackmagic Micro Panel). The best options for photography (which also work for video) are the two Contour products, the Tourbox, and the Loupedeck+ - and potentially the Palette systems, which I am going to look into further, though I’m leaning toward the Loupedeck CT as far as a more comprehensive console goes.
The Tourbox sits pretty much right in the middle (price wise) of the Loupedeck+ and Contours. And of those options, it is the only one that I would enthusiastically recommend. The Palettes and Loupedeck CT may well be on another level, but I’d hope so at more than 2-3x the price.
Unlike all of the others above (as far as I know), Tourbox has a rather unique (and exciting) history. The company was first launched in November 2016 and developed the console over the course of two years. In October of 2018, they launched a Kickstarter campaign to crowdfund the project – by Thanksgiving the campaign had ended, successfully, with 1,810 backers and about $160,000. By July of 2019, they had delivered the product all over the world. I have to admire not only their success, but their speed and quality (for the most part) engineering.
Upon unboxing, the first thing you’ll notice is the rather svelte box and packaging. Everything is inside an all-black box, surrounded by form-fitted rubberish foam. Inside is another black box, which contains the Tourbox console itself – the cables* and manual are in their own separate division of the foam.
*The Tourbox has both USB-A and USB-C ports for connectivity. It comes with a USB-A to USB-C cable, though I swapped that out for a USB-C to USB-C cable. To use the console, you must plug into the USB-C port – the USB-A port is for pass-through only (“used to connect with other PC peripherals” per the User Manual). This is why I swapped the cable for a straight USB-C to USB-C, as my Macs have Thunderbolt ports. I can’t say I use the pass-through feature, but it is an appreciated touch nonetheless.
The second thing you’ll notice is the heft and density of the console itself. Not only does this elicit the feel of a quality build, it also ensures the unit doesn’t slide around in use. Additionally, the surface is a soft, rubbery texture, which is both pleasant to the touch and alleviates the potential for unintentional movement. The downside is that it’s prone to acting as a dust magnet, especially since it is black. However, I haven’t actually found this to be an issue in practice – a quick blast from a can of duster every once in a while takes care of it.
The layout of the dials and buttons is exceptionally nice, especially because very few of them are the same shape (only the up/down/left/right and two side-by-side buttons are identical). So, unlike the Contour, with its nine identically sized and shaped buttons, it’s incredibly easy to remember the function of each button as well as navigate the controls without taking your eyes off the monitor.
Center knob dial.
Taken with Nikon Z6 + Nikkor 60/2.8G Micro
There are seven distinct buttons, plus the four directional ones, along with a knob-dial in the center, a flat wheel-dial in the bottom left, and a scrolling wheel in the top left (which also acts as a button if you push down – like a mouse). That’s a total of twelve buttons and three dials/wheels: fifteen separate control points. However, that’s the tip of the iceberg regarding the number of assignable functions since you can program actions for pressing two buttons at once, or double clicking the same button, or even pressing three buttons simultaneously.
As with everything, not all is roses. Firstly, I would have preferred the buttons and dials to be a light grey (or the surface to be grey and the dials black). As it is, everything is solid black*, which makes controls less visually distinct than they really ought to be; fortunately, they are all ergonomically different enough that you needn’t glance at them very often. The learning curve is significantly lesser than any other console I’ve used largely because of this.
*This is actually rather interesting because the Kickstarter campaign is filled with photos of what I assume are prototypes and they are WHITE with a few dials have just a slight shade of gray. And, honestly, the white looks much better; in practice, I feel it would work better as well – white is more visible and doesn’t obscure the depth differentials of the knobs/dials and the surface like the black.
The two biggest flaws are the main center dial and the flat wheel-dial, both of which feel very plasticky and cheap with essentially no resistance. The top scroll wheel is nice and smooth with sufficient damping, so I’m not sure what the thinking was behind the other two. The issue isn’t so much the plasticky construction, but rather that they have zero haptic feedback. Since they lack any sort of damping or click points, if you’re overeager in turning them, you’ll probably overshoot your target for whatever the function is (e.g. increase/decrease brush size).
Bottom left, “wheel dial” that turns with zero resistance or haptic feedback.
Taken with Nikon Z6 + Nikkor 60/2.8G Micro
The second issue is the action of some (not all) of the buttons when set to double-click; clicking two buttons at once isn’t an issue most of the time, however double-clicking a single button often registers as two single clicks. You have to be incredibly quick with your finger, otherwise you’ll just end up performing two actions of whatever the button does on a single click. I suspect this might get a bit better with time and practice, though either way the buttons are undoubtedly too sensitive – significantly more so than double-clicking your average mouse.
Fortunately, that’s about it when it comes to the negatives. Those aren’t insignificant by any stretch (especially the double-clicking issue), but given what this little console can accomplish – and its price point – they certainly don’t overshadow the positives.
The software is very simple to use, unlike some other consoles I’ve tried. It has built-in presents for programs like Photoshop and Lightroom, but I ended up re-customizing pretty much every function to my own liking. There was no preset for Adobe Camera Raw, but I’m happy to report that you can easily add any program you want (at least that I’ve tried) and customize the controls. The only niggle with the software is that it doesn’t automatically switch when you move from program to program; going from ACR to Photoshop, for example, requires you to open the Tourbox software and click over to the Photoshop presets. Not a big deal, but it should be rather simple for it to detect the active program and jump to the proper preset on its own. I would think a software update could easily address this.
Some of these may seem like major complaints at times, but they really aren’t when you consider a) the price, b) the totality of features and customizability, and c) that this was a crowdfunded project engineered in less than two years.
I’d love to see a Version 2: preferably white with grey buttons/dials; certainly fix the cheap feeling center and bottom left dials (add some resistance, maybe even some click-points like a mouse’s scroll wheel); reduce the sensitivity of the buttons for double-clicking or clicking multiple buttons at once.
Top left scroll wheel that feels and operates like a mouse scroll.
Taken with Nikon Z6 + Nikkor 60/2.8G Micro
It could even be slightly larger (an inch wider on each side would be just fine) to add two or three more dials or knobs. I’d definitely appreciate a second clickable scroll wheel and another knob.
Ultimately, though, that’s not a lot to complain about. Especially not for $169.
Find here at Amazon.
Visit their website here.
Tripods: Part One - Legs
You've probably heard it before (for good reason): a good tripod is one of the most valuable investments you can make as a photographer (and videographer, though for often very different reasons). Conversely, one of the worst investments you can make is in a mediocre or straight-up bad tripod. If you skimp on the support, you might as well tack on the cost of those useless legs to the price you tried to avoid paying for one that does its job. Not to mention the headaches you’ll encounter wondering why your photographs haven’t improved.
I’ve used a lot of tripods over the years. Like most photographers, I started out with a cheap $50 (including the head) piece of garbage under the false assumption that all tripods are basically the same (I mean, they just hold your camera and not move, right?). Here I’ll go over a few of the things to look for….
Firstly, I need to apologize for the lack of product photos in this. Due to a combination of coronavirus lockdown and dealing with my late uncle’s estate, I am not (and have not been) home in Tennessee for a while, so I do not have a lot of my gear with me here in Ohio.
You've probably heard it before (for good reason): a good tripod is one of the most valuable investments you can make as a photographer (and videographer, though for often very different reasons). Conversely, one of the worst investments you can make is in a mediocre or straight-up bad tripod. If you skimp on the support, you might as well tack on the cost of those useless legs to the price you tried to avoid paying for one that does its job. Not to mention the headaches you’ll encounter wondering why your photographs haven’t improved.
I’ve used a lot of tripods over the years. Like most photographers, I started out with a cheap $50 (including the head) piece of garbage under the false assumption that all tripods are basically the same (I mean, they just hold your camera and not move, right?). Here I’ll go over a few of the things to look for – or avoid – in selecting a tripod as well as a run-down of some good/great options that vary in price, because after all, most of us do have a monetary limit for even the most essential gear – and some people may not use or need tripods often. All of these tripods I either currently own, have owned, or have used for extensive enough periods of time to be confident in recommending them.
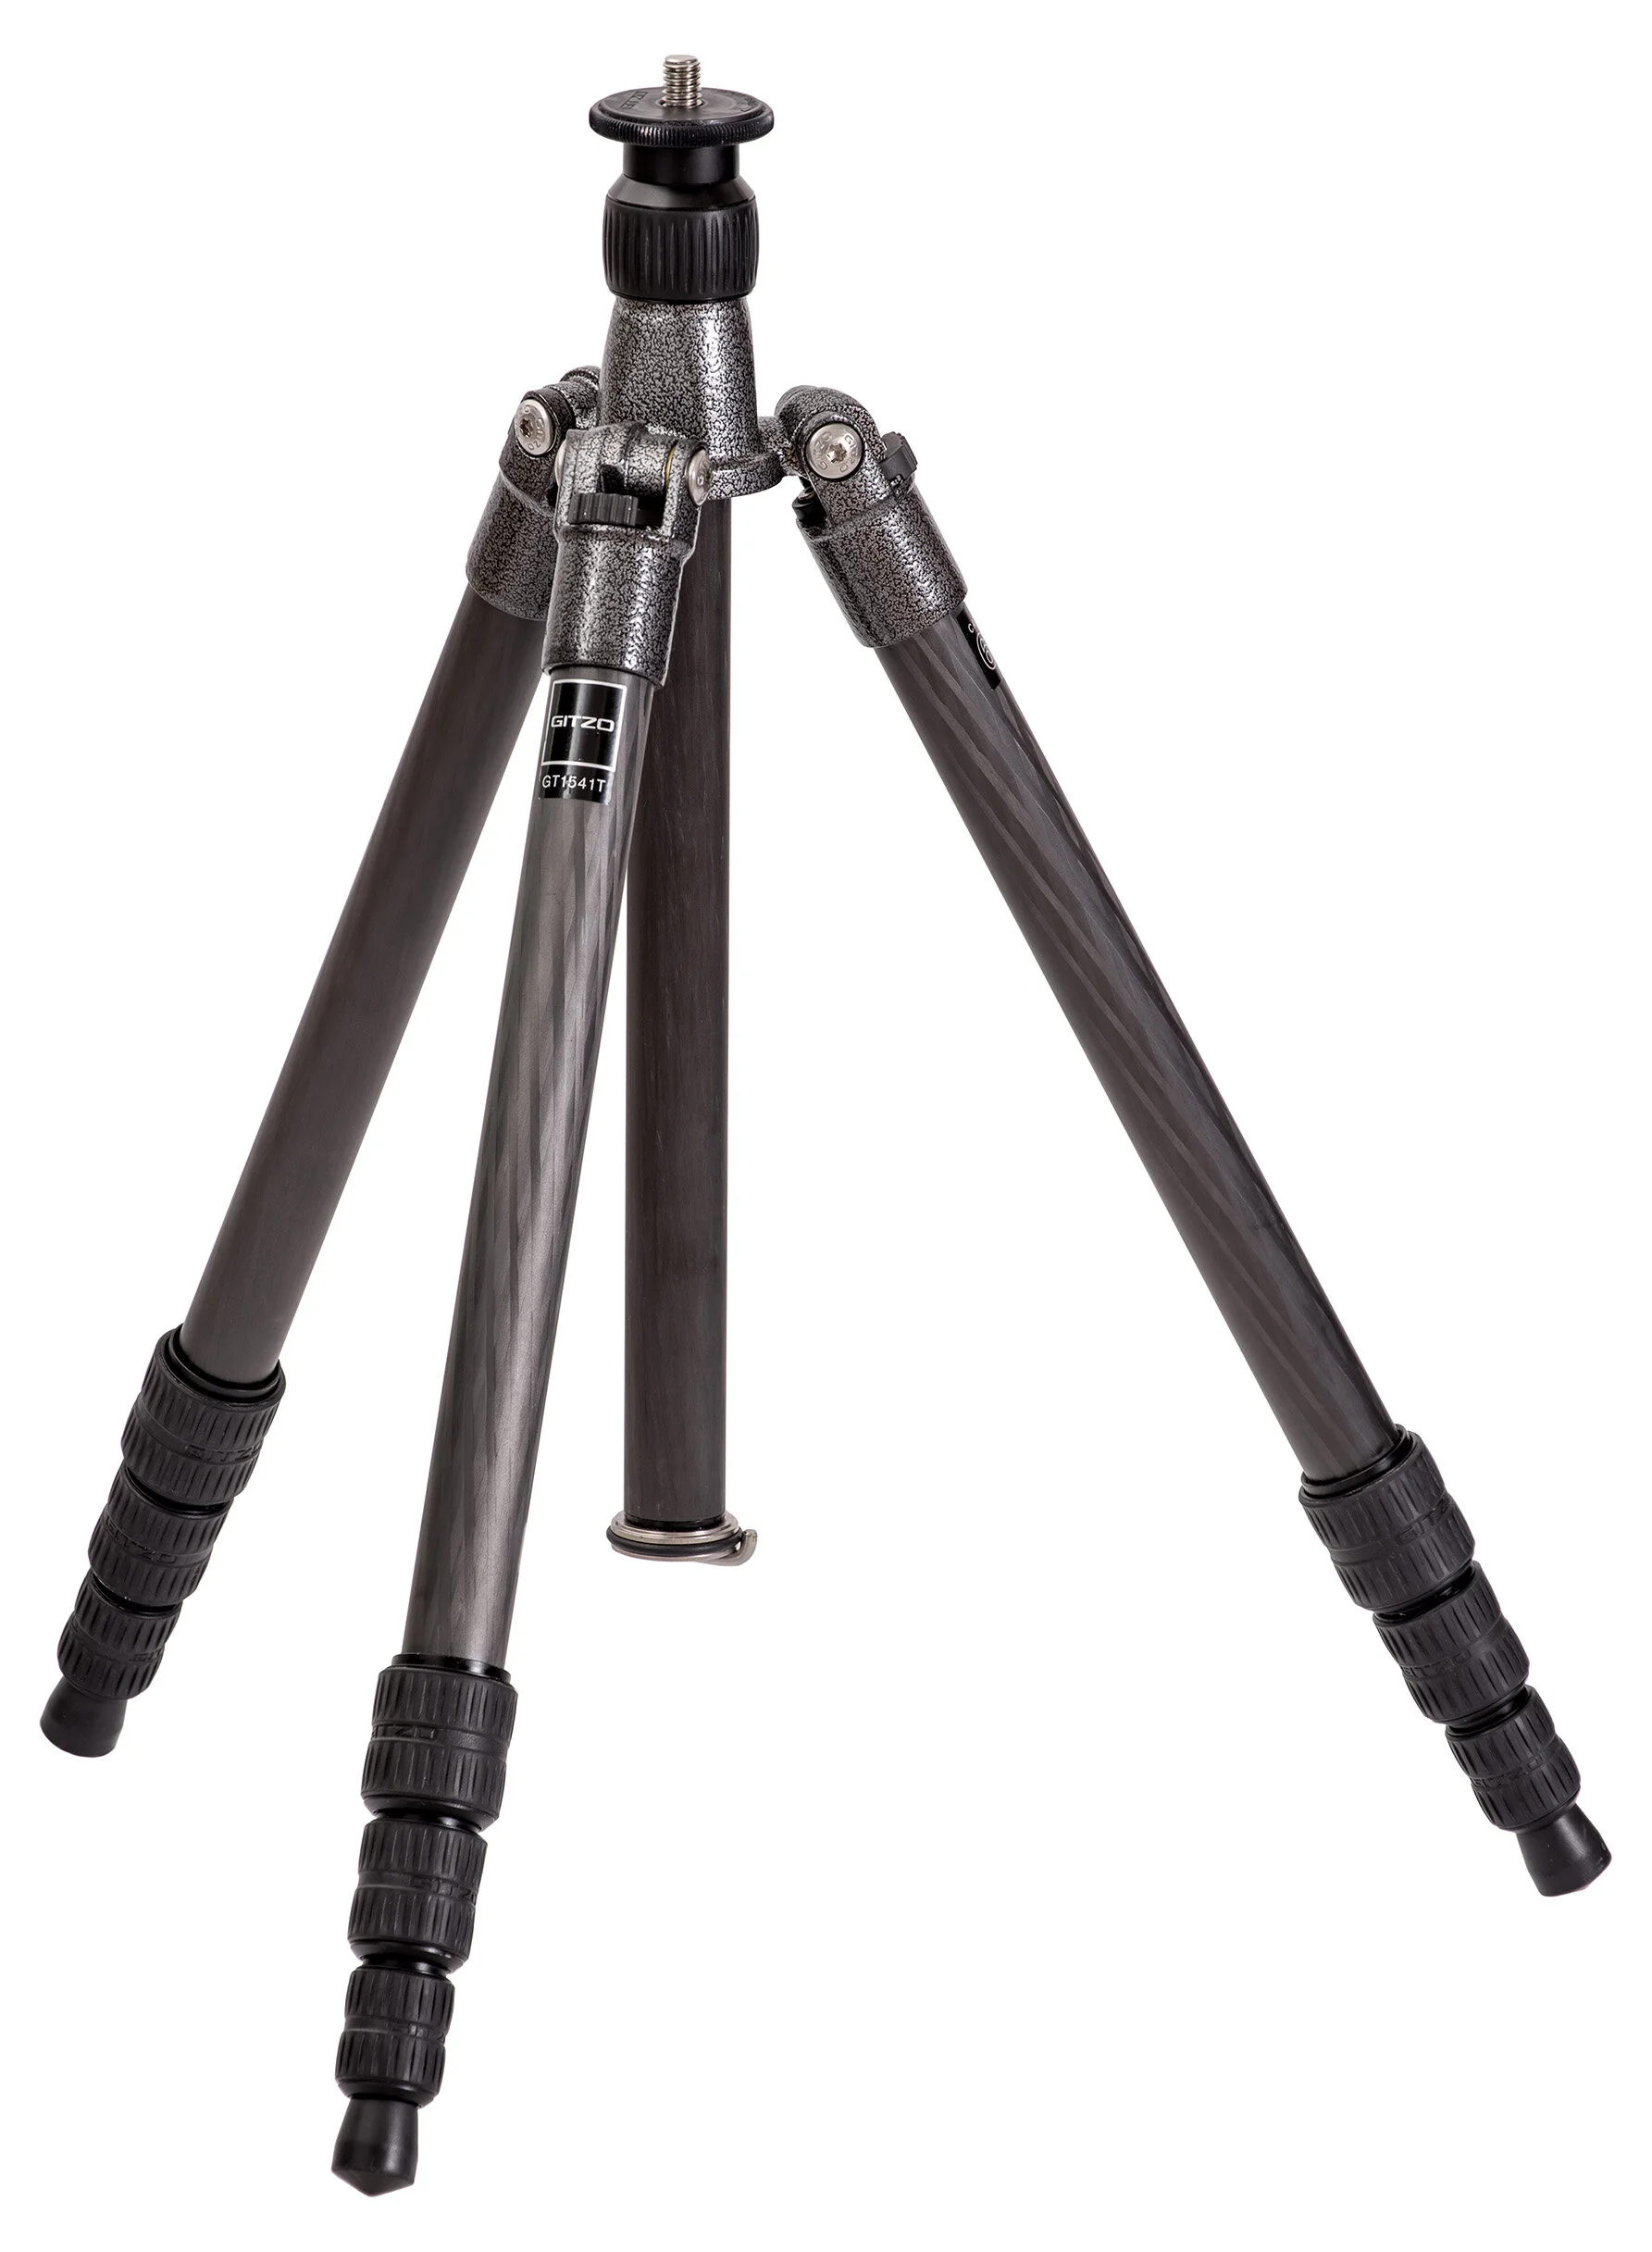
Gitzo Traveler (Image from Wikipedia, Creative Commons)
First, do not buy a tripod that costs less than $100. I draw the limit there only because I have a single example of a decent starter tripod that costs about $110, for those truly on an absolute budget (which, believe me, I certainly understand). If you buy a $75 tripod to save money and then find out its garbage, you’ve done yourself zero fiscal favors.
Do not buy a tripod with a non-detachable head. This speaks for itself. Just don’t do it. They’re trash.
Avoid tripod kits (legs + head). This especially includes camera kits that come with tripods, as those are always total junk*. But, more specifically, tripod kits that are sold with legs and a head are usually not optimal. For one, I prefer the latitude of choosing the best legs for my needs and the best head, instead of having that duo chosen for me. And you’re probably not going to want to spend extra money on a legs/head combo if you’ll end up replacing one. Many of the Gitzo head/leg combos are very good and more than sufficient for 99% of photographers, largely because Gitzo makes quality products. Their ball heads are not my first choice, but they are still excellent options for most (caveat here being that I obviously have not used every Gitzo product, but of the fair number I have used, none have done me wrong).
*Some camera kits come with Joby Gorillapods and while these are quite inadequate for most uses, they have their place. They should never be your primary gear, however. I like them for their incredible versatility when used with phones/compacts/extremely light-weight mirrorless.
Aluminum vs. Carbon Fiber. We’re going to leave niche materials like wood and basalt* out of this. A significant majority of what you see online or in stores will be aluminum or carbon fiber. The most apparent difference is that aluminum is cheaper and carbon fiber is more expensive. Most sites and reviews give weight as the primary advantage for carbon fiber, but this is a woefully insufficient understanding of its practical benefits.
*Basalt is a fiber extremely similar to fiberglass and primarily used in textiles, particularly flame-retardant fabrics for automobiles/racing and aerospace engineering. Basalt is derived from volcanic rock – more specifically, silica. It just so happens that fiberglass is also made of silica. There are some underlying differences in physical properties, but outwardly basalt is black in appearance and fiberglass is white (technically clear, but appears white). Basalt tripods were, I believe, first developed (and now discontinued) by Gitzo, riding a wave of marketing buzzwords that sound nice but offer no benefits over existing materials.
Carbon fiber is quite literally what it sounds like: thin fibers of organized carbon atoms. These fibers are bonded together with a thermosetting polymer and then cross-woven and molded to form the tripod legs. It is not unlike basalt or fiberglass in this regard, though displays higher rigidity, tensile strength, and less thermal expansion. The difference in rigidity is one reason that CF is good for tripods but bad for, say, boats or fishing poles (high rigidity means low flexibility).
For our purposes, the components and manufacturing process of tripod legs make carbon fiber superior over aluminum for a number of reasons:
1) For a given volume, it is lighter in weight.
2) Because of the way carbon atoms are arranged, the fibers themselves have a very high tensile strength (CF has a higher tensile and composite strength than steel, kevlar, titanium, diamond, brass, etc.).* It is the one of the most dynamic and efficient composite materials in the world – about 15-20x stronger than steel if we consider mass equivalence. Carbon fiber is popular in racing vehicles as well as sports cars; it’s often used for body panels and other components to shave weight, though the most impressive utility relates to mechanical components that need to withstand high pressure. CF is often used to replace steel and aluminum drive-shafts because it is lighter, stronger, and safer (if it fails, it simply sheers off into strands, causing no damage to the car or other cars). A CF driveshaft also effectively produces more horsepower and accelerates faster (the driveshaft cannot alter the engine’s output horsepower, but the lower mass and inertia of the carbon fiber shaft effectively and measurably results in higher torque and HP).
*Note that there are many types of carbon fiber, kevlar, steel, etc. There’s UD (unidirectional) carbon fiber, varying binding polymers and processes, different weave patterns, etc; there's carbon steel, alloy steel, stainless, etc. There are also different measurements of strength, e.g. tensile, yield, etc., as well as measurements of elasticity. Thus, the comparisons here are broad and absolutely variable depending on the specifications of the exact material and design used.
3) After being bonded with a polymer, the resulting material can be woven in an orientation that maximizes strength and increases axial capacity.
4) Damping is significantly improved – oscillations are dispersed more efficiently throughout the complex superstructure of fibers, thereby reducing vibration frequency. This may be the most universally valuable distinction between the two materials as it is one of the primary reasons to use a tripod in the first place. Camera manufacturers go to great lengths to minimize shutter shock (EFCS is your friend) and improve mirror damping (in DSLRs), yet those are minor in frequency compared to tripod-induced vibrations.
5) As an extension of #4, carbon fiber “settles” quickly; oscillations are dispersed and the structure returns to equilibrium more efficiently than aluminum. Think of a triangle (the percussion instrument) which emits a sharp, shimmery sound with a lengthy, persistent reverberation. Compare this to a (theoretical) instrument of the same size and shape but made of wood or plastic – hardly any sound at all, let alone reverb. This is partially a combination of damping and a rapid dispersion of amplitude (“settling”).
6) It is more resistant to extreme temperatures – more specifically and importantly, thermal expansion and contraction is greatly reduced. It also does not get noticeably hot or cold to the touch. Note that in extremely cold temperatures, the stiffness of carbon fiber can result in excessive brittleness. This is irrelevant unless you regularly shoot in the Arctic circle.
Not one of my photo-centric tripods is aluminum. All of my video tripods are, but we’ll touch on that at the end. I realize the above is a lot of words and perhaps includes some unnecessary asides, but it should demonstrate – as well as one can without physical experience – why carbon fiber is extremely superior to aluminum, and it is not just about weight (in my opinion, that’s one of its lesser benefits).
Do not believe the stated load capacity. This goes (if not more so) for heads as well. I would say to anticipate a realistic load capacity around 20% of the stated spec. Even that is unreliable as the tripod’s effectiveness is not invariable; it changes based on position of the camera (or lens, if using a collar) and center of gravity, as well as height. The tripod will be most stable with all legs and columns collapsed and least so with all extended, since each deployment of a section introduces a new point of flexibility and each section gets progressively smaller, limiting flexural strength and damping.
Because of these variables, I’m not sure how the load capacity is measured. Ideally, it would be at maximum height as such a measurement is only as good as its weakest point. But, I’m fairly confident this is not how they are (all) measured, especially because….
There is also the matter that every manufacturer clearly differs in how they calculate their specified load capacity. Video tripods (and heads) often have a lower stated capacity than a similar photographic counterpart – even from the same manufacturer – but there’s no doubt which one is sturdier. Three Legged Thing tends to vastly overstate their load spec, while Gitzo is relatively reliable. The Three Legged Thing Leo 2.0 specifies a 66 pound load capacity while my Gitzo GT1545 Traveler indicates 22 pounds. If anything, it is directly the other way around. I wouldn’t use the Leo for anything other than a mirrorless camera and average lens, but I’d comfortably use the Gitzo with a DSLR and large lens.
More leg sections means less stability. See above. For maximum strength, it is better to have a three-section tripod than five. Disadvantage and counterpoint: the collapsed length of the tripod is determinate on the length of the longest leg. This is why travel tripods often have more, but shorter, sections. More sections and reduced length, along with the ability to reversibly fold the legs up and over the head base, allow these tripods to be extremely compact. It’s a tradeoff between stability and weight/size, which is one reason I have more than a single tripod.
Deploy the top-most sections first and avoid extending the center column until necessary. See above again. The top-most sections are thicker, wider, and contain more mass (thereby dispersing oscillations more effectively). And again, each leg extension (or column) introduces new points of flexibility.
Try to get a tripod with a center column hook. A good number of the higher-quality tripods have little hooks (sometimes recessed and spring-loaded, sometimes not) on the bottom end of the center column. These are for hanging weights, usually a sandbag (though you could use a shopping bag full of apples, no one cares), thus reducing the center of gravity and increasing stability. If the tripod does not have this, there are tripod “hammocks” or “aprons” or simply “bags” that fasten to each of the three legs with a pouch suspended in the middle. You can then load these up with rocks, weights, the aforementioned apples, whatever you have available to you. An advantage to these over hook weights is that you can also place accessories or gear in them for quick and easy access. But otherwise the hooks are much more convenient and reliable.
Consider your camera. This may not seem obvious at first, beyond the weight of your body. However, higher-resolution sensors will require greater stability. This is true on or off a tripod. The detrimental effect of angular displacement, whether via hand-shake or tripod vibration, is directly correlated to pixel count per angle of view. It is a rather common misconception that the correlation is to pixel pitch/pixel density, but this is inaccurate. A 20MP Micro 4/3 camera will be less susceptible to vibration-induced pixel blur than a 24MP full frame camera, despite the former having a significantly higher pixel density. This is because, for a fixed angular displacement and angle of view (different focal lengths, of course), the higher MP sensor will displace more pixels per degree. If each camera has a lens providing a 100-degree horizontal field-of-view, a horizontal displacement of one degree will displace an equal number of pixels in a 6000x4000 APS-C sensor as a 6000x4000 FF sensor (60 pixels, in either case).
Consider the type of tripod feet you might need and what options your tripod natively has: Cheaper tripods generally come with simple rubber feet. These may be flat with a pivoting joint, rounded, rounded off to a point, or a number of other designs. Good tripods come with either interchangeable feet, or a rubber foot with a recessed, extending spike should you need to deploy it, or both. Replacement feet can include spikes, suction cups, variously shaped rubber, or clawed shoes for snow, ice, and sand.
Consider the minimum height. Most good photography tripods have a very low minimum height (not true of all video tripods), but there can still be a big difference between 5.5” and 2.3” for some photographers, particularly macro and some landscape.
How do the legs lock/unlock? This may not seem like a big deal and is partially a personal preference. The leg sections will secure via either a flip-lock or a twist-lock system. I suppose flip-locks are technically faster to engage, but twist locks are much stronger given equal quality of build. Obviously, there are garbage twist-lock tripods and very good flip-locks. I personally prefer twist locks not just for their stability but also tactility in use; all of my tripods except one are twist lock. In my experience, flip-locks are simply more prone to slippage because the locking force is fixed – you can’t tighten it any further than however it is made (which, over time, often becomes insufficient as the materials wear). I would expect this to make even more of a difference with aluminum tripods as the metal will expand/shrink much more so than carbon fiber.
Consider unique features among tripods that may be of interest to you. As you’ll see in the upcoming tripod recommendations, some tripod manufacturers and models have features that are either wholly unique or fairly unique, and these may be of interest to you. Examples include the ability to detach legs for use as a monopod, or inverted center columns.
The best brands. This is very general because even the best manufacturers sometimes make mediocre or even crap gear and some of the lesser respected brands put out some excellent equipment. But, in general, the absolute best brands to look at if you want a high-quality tripod are, in my experience: Arca Swiss (heads only), Gitzo, Novoflex, and Really Right Stuff. Others that fairly often produce great tripods: Manfrotto, Induro, Sirui, Benro, Three Legged Thing, and Feisol.
I think that about covers the differences between common photo tripods and what to look for and what to avoid. To wrap up, I’ll suggest a few tripods of varying cost that I either own or have extensively used. A lot of these have a number of variations if you look on your site of choice, usually relating to the number of leg sections. But otherwise they are identical; for example, the difference between each numbered Gitzo Traveler Series is the max height (aka “folded length” on B&H, but folded length and max height are directly correlated for a given number of leg sections).
Zomei Carbon Fiber Q666C (~$110)
This is the budget budget tripod – a great option for those with limited finances and/or amateurs who are starting out. It comes in at just $110, which frankly is incredible given its quality. It also comes with a ball head, though I cannot speak to its quality as I swapped it out for one that had an Arca Swiss quick release. It seemed decent enough, though, and would likely be sufficient for light-weight mirrorless or small DSLR set-ups.
That you can get a tripod – which also converts into a monopod – with twist locks, a reversible center column, a counter-weight hook, and a folded length of just 14.5”, all built from carbon fiber for just over a hundred bucks is nothing short of impressive. Even more impressive is that it isn’t total garbage.
It bears repeating that this is still a budget option. Quality control is not comparable to other brands listed here; build quality is comparatively poor (the ball head itself looked to be composed of many plastic parts) … it simply feels cheap when you add up all the little things. It also only has a one-year warranty – most others range from three up to ten (!). The “TLDR” of it is: excellent features on paper at an unbeatable price, but if you intend on investing in a tool that you can regularly depend on and use, I would look elsewhere. Otherwise that $110 quickly becomes $110 + the cost of a better tripod when this one gives up the ghost after a year.
Find here on Amazon.
3 Legged Thing Leo 2.0 (~$260)
This is an affordable, light-weight (3.4 lbs.), carbon fiber travel tripod. The legs pivot up to fold around the base/head for a folded length of 14.7”. It has five leg sections and a two-section center column; the inherent downside here being that each section is quite short, so it is not quick to deploy from collapsed to full height. Maximum height is 54.3” and a minimum of 4.9”. Maximum load capacity is rated at 66 lbs, which is nothing short of total nonsense. I’m sure it can safely take a 66 lb. load without falling apart, but I certainly wouldn’t trust it for any kind of stability.
Aside from its super compact size, it has a number of nice features. Each leg is detachable and the center column is removable. The legs can be used as a monopod up to 39.9” or can be combined with the detached column for a 55.7” max height. The feet have recessed spikes and can be replaced with claw feet. Additionally, the legs can be removed and the center column attached to a (separately available) “foot stabilizer” – basically a miniature set of legs – to form a super compact table-top tripod.
If absolute size/compactness were of the essence, this would be an excellent option – provided the camera setup isn’t too large. Having a good enough tripod that is small/light so it can always be with you is important to me. I’ve since replaced the Leo with a Gitzo Traveler GT1545T Series 1 – it’s actually sturdier but lighter, though not as compact and certainly not as cheap. While I would certainly recommend the Gitzo Traveler over the Leo, the unique features and lower price of the Leo do make it worthy of consideration. And unlike the Zomei, it is very well-built with a 5-year warranty. It also comes with a carry bag, replacement set of feet, and a keychain multi-tool with a hex key + coin slot for tripod plates. The latter is one of my favorite “little things that make your life easier because you always have it.”
And the bronze version is damn attractive.
Manfrotto MT055CXPro4 (~$500)
At a more mid-level price range, this is a very good all-around tripod for both studio and location work. It doesn’t fold up particularly small (21.3”) nor is it particularly light-weight (4.6 lbs.), but it’s a great compromise between portability and stability, along with several nice features that make it useful for a lot of studio work.
(The C is for carbon fiber, 4 is for the number of leg extensions; there are models without the C – aluminum – and models with just 3 extensions, with a lower maximum height)
The chief feature is its Q90 center column that can be rotated on its side by 90 degrees; an excellent feature for overhead product or macro photography. Note that stability and rigidity suffer significantly when in this orientation – weight is not the concern so much as the decreased vibration damping; the center column is now the weakest link with its support offset significantly from the center of gravity. This has not been a problem at all in the studio, but is why I generally never deploy this feature in the field – it’s much more susceptible to wind or other small movements. The Q90 column has also been quite useful for placing lights overhead or at an angle in a pinch.
It has a rotating bubble level, so you can use it in either the upright or 90 degree positions. It does have flip-lock legs (“Quick Power Locks”), though they are quite strong. Its 19.8-pound rated load capacity is much more reasonable than claims by other manufacturers – I’ve never shot with that much of a load on it but the tripod legs easily hold a hundred pounds without slipping. I didn’t feel comfortable putting my entire body weight on it but safe to say I’m not worried about the load capacity of a camera set-up.
Finally, it comes with a stupid 6-month warranty which is extendable to 10 years with product registration. Unfortunately, this registration extension nonsense is commonplace and while I hate the idea that you miss out on 9.5 years of a warranty just because you didn’t register online, a 10-year warranty is quite a lot. So, just remember to do that (I believe within one year of purchase, but don’t quote me on that – do it ASAP). This basically applies to all camera products (most Nikon products are 1 year with 4-year extension w/ registration) and is a great reason to make sure to buy from authorized dealers – for Amazon this means it should be “Shipped from and Sold by Amazon.”
Find here at Adorama and Amazon.
Gitzo Traveler GT1545T Series 1 (~$500)
I won’t mince words: Gitzo products epitomize the intersection of utility, quality, and craftsmanship. I have yet to be disappointed in any of their products, though I have heard complaints from some. I don’t travel the world (though I’d love to) and I don’t fly often. My gear is almost exclusively handled by me and, while well-used, I don’t regularly work in extreme conditions; the worst that my equipment regularly sees is the heat and wicked humidity of southern summers. And unlike many other manufacturers, Gitzo products have never given me an issue in any situation.
Along with being reliable, they are also pleasant to use. The Traveler GT1545T Series 1 is a very lightweight (2.3lbs), compact (16.7” folded), carbon fiber travel tripod. It’s a four-section tripod with a 60.2” maximum height – I opted for the four-section over the five for better stability and quicker deployment; the difference in folded size is only a few inches and would be barely noticeable for all but those who must travel absolutely as compact as possible. Oddly, the 4-section is also six inches taller at maximum height despite having fewer sections.
The lovely hammertone finish (a Gitzo staple) of the metal (magnesium?) components looks and feels very pleasant. In fact, the overall operation of the tripod is exceedingly fluid and pleasant.
Maybe the nicest feature of this tripod – beyond its overall build quality and compact, lightweight design – is Gitzo’s G-lock system which is easily the best leg-locking system I’ve used. They seem like simple twist locks, but there are a number of differences; 1) you can lock/unlock all legs at once, or lock/unlock one section without the other sections being locked. On other tripods, this would cause the leg to spin endlessly unless you locked the other sections first, 2) they require very little turning and hardly any force to securely lock down. Other tripods sometimes feel like you have to ratchet the leg down as tight as possible to avoid slippage.
Gitzo’s “Carbon eXact tubing” is also phenomenal – some of my Gitzo Traveler leg sections are half the diameter of the Manfrotto CXPro4, yet are actually stronger and basically impossible to flex. Take note: not all carbon fiber is created equal; the orientation and design of the weave pattern makes a huge difference.
My only complaint is that – for a tripod at this price – it doesn’t come with a center column hook. You have to shell out an extra $30 for the Gitzo D104214 accessory hook, which screws into the bottom of the column.
Warranty is six months extendable to 7 years with registration. I believe Manfrotto and Gitzo are owned by the same parent company (Vitec) – they both use the same site for warranty registration at any rate.
Find here at Adorama and Amazon.
Gitzo GT5543LS Systematic Series 5 (~$1,100)
There isn’t a whole lot to say here that wasn’t covered above in regards to the Traveler – in terms of Gitzo’s proprietary features and build quality, all of that remains the same.
Beyond that, this is more tripod that almost anyone could ever need (rated load capacity is 88 pounds and I believe it). I’m not sure what kind of system would be too much for this thing; you could probably use this as a bar stool if you were short on seats.
Biggest disadvantage is, of course, the price tag. At nearly $1,100, it’s not exactly a “yes you must have it” piece of gear – there are other, cheaper Gitzo tripods that would probably serve you just as well, especially if you only shoot lighter weight cameras/mirrorless systems. This one lives in the studio for the most part (it’s not exactly pleasant to tote around at nearly 6 pounds). It’s actually largely overkill for me, given that most of my studio work is now mirrorless and I’ve sold off the Cube. But I see no point in dumping it.
If you need the best, here it is. In fact, pretty much any of the Gitzo Systematics will do right by you. Just pick what fits your needs and preferences best.
Find here at Adorama and Amazon.
Benro A373T Aluminum Video Tripod (~$205)
I’m throwing this in here because it was a truly shocking purchase for me. I needed a second tripod for a B-cam and didn’t want to spend a ton of money just for this one use, so I went in on this Benro based on some quite good reviews. Let’s just say I was blown away when I received it; build quality, rigidity, sturdiness, ease of use – all phenomenal. It has a rated load-capacity of up to 55 pounds and I actually do not have a reason to disbelieve it. It was more than enough for an average size cinema camera fitted with an average-to-above average cinema prime, matte box, focus puller, external monitor, etc etc etc.
It’s a 75mm bowl design, but I was going to attach a Nitrotech N12 head (excellent, by the way) which is a 75mm flat head design; I purchased the Benro 75HB – a half ball adapter – for $50. The adapter easily slips right in the bowl and allows you to mount flat base heads (and easily level them).
I have simply never seen this level of quality in a $200 tripod. This could easily cost $500 and I wouldn’t feel ripped off.
You may wonder about the choice of aluminum over carbon fiber – and yes, there is a CF version for $465. Since this was to be a dedicated video tripod for me, the choice changes a bit for me:
1) the aluminum was less than half the price
2) the difference in weight is hardly as important – with a large video head and huge cinema camera rig, you’re not going to be backpacking in the Sierras either way. So, cutting from 7.9 to 3.8 pounds is hardly a big deal to me.
3) The biggest advantage of carbon fiber – vibration damping and dispersion of oscillations – isn’t a factor in the same way it is with photography. Minimal vibrations, e.g. those we can’t feel, may easily show up as pixel-level blur in a photograph, but we’ll never notice them in a video at 24fps. There’s also the matter that we often introduce the movement, via panning or tilting.
4) Finally, damping shutter or mirror vibration isn’t even a consideration.
So, all told, I usually don’t feel the extra cost of carbon fiber is worth it for video legs over the aluminum counterpart. Certainly not at more than 2x the price.
Anyway, for video work, I cannot recommend this tripod enough. Maybe I got lucky, but most of the reviews seem equally pleased. For photography, if you’re wondering, no, this would not be my choice at all.

UsedPhotoPro and KEH: Buy (and Sell) Used Gear
I wanted to do a quick write-up on two of my favorite suppliers of used camera gear (in the United States, anyway) – Robert’s Camera in Indianapolis, better known as UsedPhotoPro when referring to their used department; and KEH Camera in Smyrna, Georgia just outside Atlanta
Disclaimer: I am an affiliate of both UsedPhotoPro and KEH, so any referrals via this site do net me a small fee. However, there are very good reasons I wanted to partner with them. Keep reading for more on that.
I wanted to do a quick write-up on two of my favorite suppliers of used camera gear (in the United States, anyway) – Robert’s Camera in Indianapolis, better known as UsedPhotoPro when referring to their used department; and KEH Camera in Smyrna, Georgia just outside Atlanta.
Disclaimer: I am an affiliate of both UsedPhotoPro and KEH, so any referrals via this site do net me a small fee. However, there are very good reasons I wanted to partner with them. Keep reading for more on that.
I have purchased a lot of gear from both companies, but UsedPhotoPro in particular has sold me untold numbers of cameras, lenses, and other equipment. Back when I was repairing cameras and lenses, I would order clearance (“as-is”) items from them pretty much daily – everything from standard 50/1.8 vintage lenses to Leica rangefinders – almost anything you can think of. And, of course, they were (along with KEH) my go-to source for non-clearance used gear.
Honestly, I’m pretty sure some of the folks at Robert’s thought I was insane, given how much I ordered from them. Depending on if I was at home in Tennessee or up in Ohio, I would have orders shipped to both locations. Once, when picking up an order in person, the fellow assisting me noted that it was very strange how a guy in Tennessee also named Matt Williams orders a lot from them as well.

Take 5% off for first time shoppers
I’ve been to Robert’s Camera’s location in Indianapolis countless times to pick up orders. The staff – whether in person, over the phone, or via email – has always been the best group of folks I’ve ever dealt with. Any time I had a problem (of which there was one, maybe two, out of many hundreds - if not thousands - of orders) it was corrected immediately and without issue.
KEH, which I have never been to in-person given its location in Georgia, has likewise never been anything but nice, accommodating, and quick to answer or solve any requests or issues. Both companies ship out same or next day* (depending on when you order) and items are always as-described or pictured.
*At least they normally do. COVID-19 may well be delaying orders a bit, just as it is at B&H and Adorama.
UsedPhotoPro has detailed photos of all of their items, so it is very easy to gauge the cosmetic condition. Optical flaws or functional issues are obviously harder/impossible to photograph, but you can trust their descriptions. KEH only includes stock photos on their website for each item, but let me tell you this: anything rated “Bargain” or higher is going to be in excellent condition. KEH’s “bargain” is what many eBay sellers would call “excellent” or “near mint.” I’ve even ordered a number of “ugly” items that were in considerably good condition. “As-is” items are best avoided unless you need parts or want to repair.
Both companies of course purchase used gear – I have not sold anything to either, so I have no idea what their offers are like. However, I do know that KEH will give you a free shipping label to send your gear in, examine it, send you a quote, and if you decide not to sell, they’ll ship it back for free. No loss to you either way. UsedPhotoPro’s site should detail how they do quotes, but I am sure it is simple.
Oh, and did I mention that used gear from either store comes with a six month warranty?
There aren’t many places that I wholeheartedly recommend for purchasing camera gear; there are even fewer when it comes to used gear. UsedPhotoPro and KEH are the only two that I would recommend without hesitation and without exception.
About My Reviews & This Site
First of all, thank you for visiting my new site. As noted above, it is still under construction but should be fully functional shortly.
This is site is centered around photography (and some videography/cinematography). The main types of content you will find here are:
1) Gear reviews (e.g. lenses, cameras, tripods, etc.)
2) Informational articles about photography (e.g. shooting technique or post-processing in ACR & Photoshop)
3) "Musings" or general thoughts about photography and the camera industry.
4) Articles that are more nebulous in nature (for example, I'm working on one about Cinema vs. Stills Photography) - I guess these could be called "philosophical" articles.
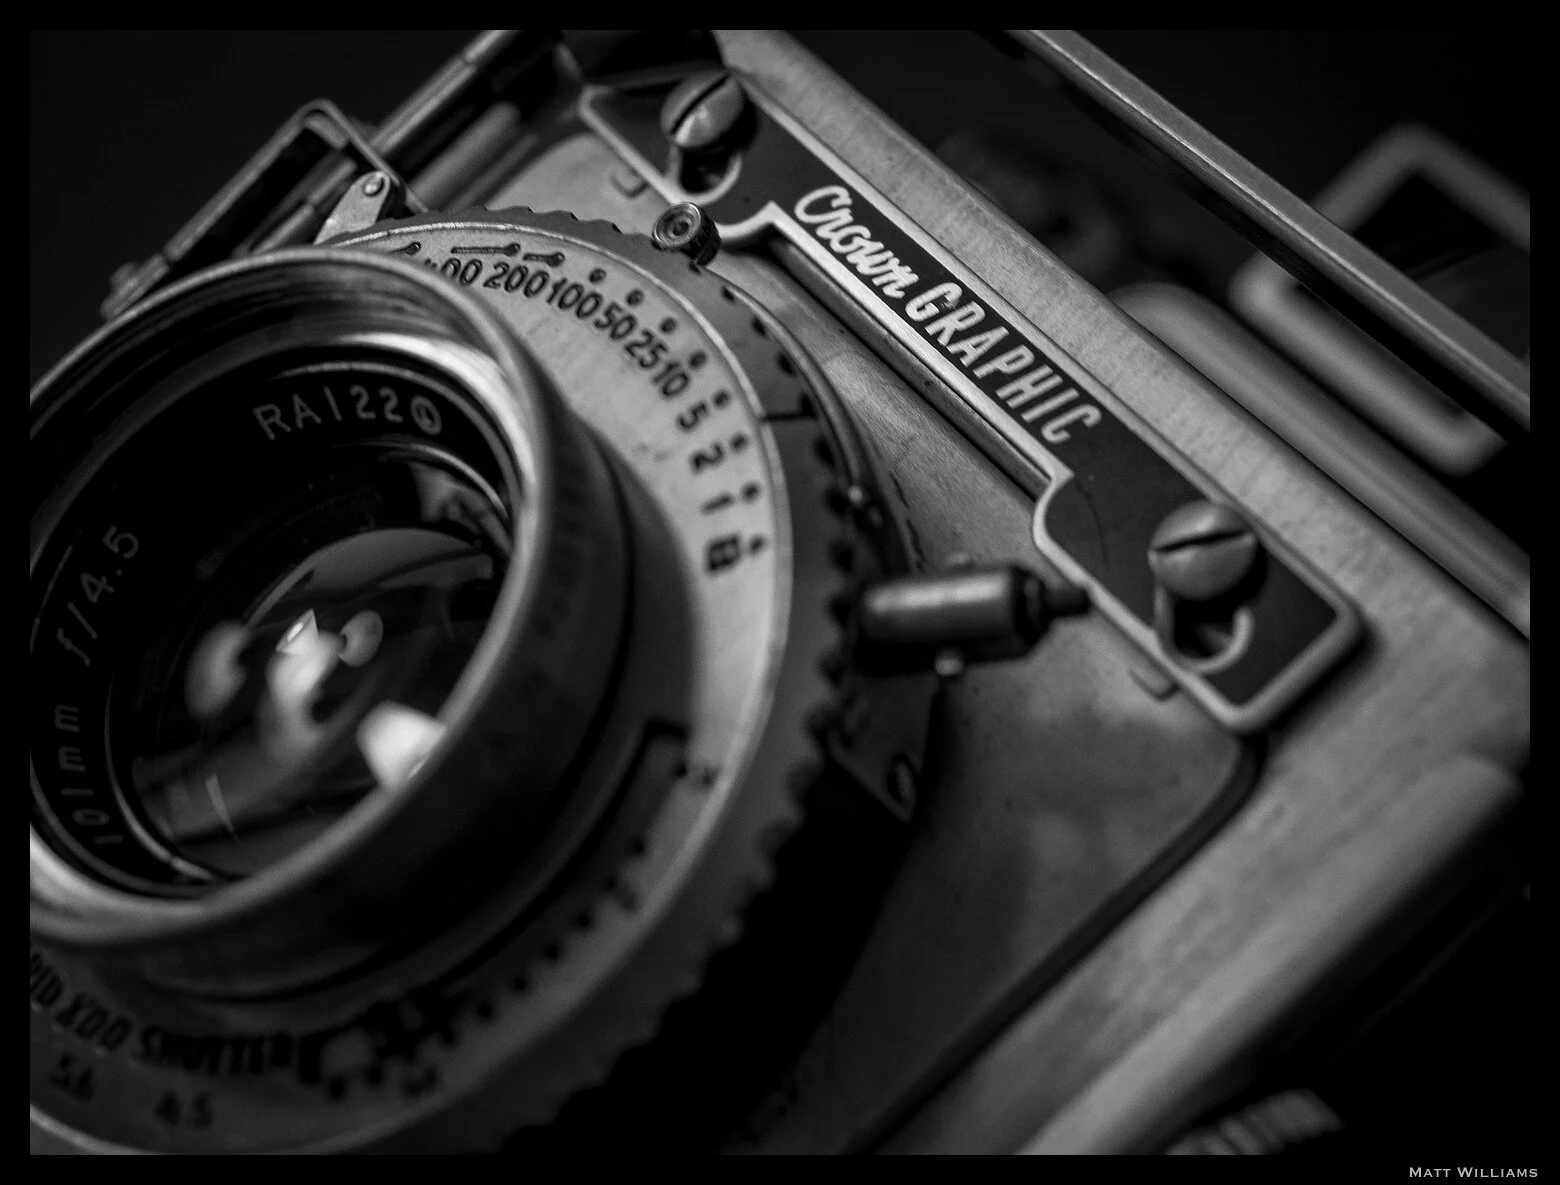
Graflex Crown Graphic
Olympus OM-D E-M5 w/ an Olympus 30/3.5 Macro
Given the volatility often seen in the comments and forums of gear related sites, I figured I’d get a few things out of the way up front about how I approach my reviews and why I do or do not include certain things a person may be accustomed to if they read other sites. For example, I don’t shoot test charts or brick walls*. If I did, I certainly wouldn’t post the pictures.
*Ok, sometimes I shoot brick walls as they are an easy and quick way to gauge certain optical flaws with lenses and rule out (or confirm) sample variation for my own testing purposes. The fact that I have to walk ten feet to get to a brick wall is helpful too.
I’ve used, by every reasonable definition, a hell of a lot of cameras (translation: at least one camera, usually far more, from every modern manufacturer with the exception of Phase One). I am loyal to no brand beyond the investment I have in my own equipment; it is of course costly to switch an entire system. And rather pointless, given that every system has both strong assets and varying deficiencies. You either work around the deficiencies, find an alternative, or invest in multiple systems.
Such shortcomings can range from lack of necessary lenses (macros, tilt shifts), to size/weight, to basic feature sets; a Fujifilm X100F probably wouldn’t be a sports photographer’s most wise choice of gear, while a Nikon D5 likely wouldn’t be the greatest pick for backpacking the Appalachian Trail.
None of this is to say I don't have my preferences in terms of UI or haptics - which generally tend to be (relatively) similar among models from the same manufacturer - but again, this has nothing to do with the name on the front. Besides, show me one person who doesn't have such preferences one way or another.
The point is: I use the gear that works for me. What works for me is not what works for everyone. I won’t tell you how well X camera does at tracking a football player because I don’t shoot sports. I don’t care what the name is on the camera; it either works for me or it doesn’t. Nothing is ever perfect, nor is anything ever absolutely worthless. I have to decide where it lands in that gray area for me; though I may certainly recommend something that doesn’t particularly work for me, but is obviously valuable for others.
I run systems across three different sensor sizes (four, if you count the iPhone). At any given time, I have lenses from at least seven or eight different manufacturers. That’s just counting non-vintage lenses (and I don't care to spend half a day counting the number of those in my arsenal). Everything is ultimately a compromise between utility, need, quality, price, and ROI (and, I admit, there is often a “want” factor that wiggles its way in there too). A lens like the Panasonic 12-32/3.5-5.6 is not a perfect – or even great – lens (it is very good, though) but it does check a lot of those boxes and ultimately adds up to a rather great investment, particularly if purchased as a loss leader within a kit.
I am both a photographer and videographer. That does not, however, mean that I will test the video capabilities of every camera. In fact, I won't test the video capabilities of most stills cameras. I have no interest in using a Nikon D850 for its video in the same way I have no interest in using a Blackmagic Pocket 6K for stills photography. If I’m going to shoot a casual video for whatever reason, I’ll just use my iPhone. A camera has to have significant enough advantages for me to consider it as a useful videography tool and therefore for me to subsequently spend time evaluating it for such use. Not to mention, my threshold for video quality is quite high and there are few stills/hybrid cameras on the market that meet those demands (though the list is ever-growing). Video remains in a very binary realm for me - either impromptu and casual (deploy the iPhone) or extremely planned and meticulous (deploy a cinema camera). Exceptions, of course, exist.
Lastly: I do not post full-resolution photos because I've had far too many instances of image theft, even just via personal social media. Exceptions may be made in A-to-B comparison (i.e. X lens vs. Y lens) reviews.
Ishimoto Blog:
Integer posuere erat a ante venenatis dapibus posuere velit aliquet. Fusce dapibus, tellus ac cursus commodo, tortor mauris condimentum nibh, ut fermentum massa justo sit amet risus.